Remember these things?

Well, they're back. I remember making bracelets and hot pads and other odd things from them when I was a kid in the late 80s or early 90s. I saw the cutest idea and had to share. It's a great, fun little thing to whip out during the summer break when your kids come whining to you about how bored they are (that's why we've made about 10 so far today).
I got my bag at Hobby Lobby. I got an enormous 1 lb. bag for $5...there are hundreds of loops in there... I let my kids pick and this is what they chose, but I think I may go back for the neon colored loops...I think I'm attracted to the neons because of all of the neon colored clothing my parents made me wear as a kid. Okay...so...back to the project...
Pick out 3 colors that you like (you don't have to do a 3 color pattern, you could do whatever you want, this is just what we're doing because it's easier to explain), take 3 loops of 2 colors and 4 loops of the 3rd, but set that extra loop aside until the end. *Make sure you stretch the loops out a little bit before you get going.


Take the first color loop (ours was pink) and twist it around your fingers like so.

Then take the 2nd colored loop (green) and do the same thing.

Now, take the pink loops and pull them over your fingers so that you just have the green loops on your fingers. It's like using a loom--take the bottom row and loop it over the top, and only have ONE color of loops on your fingers at one time.
This is what it should look like palm side up

Palm side down

Now take the 3rd color and do the same thing: twist them onto your fingers and loop the previous color over. Continue those steps in order until you've used all but that last, extra loop. This is what it should look like front and back.


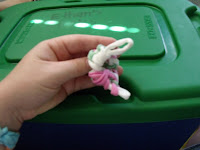
Now, you're gonna take all the loops off your fingers and put them onto your index finger--one-at-a-time from the bird finger to the pinkie. Like so.


Next you take that extra loop and slide it under/through all of the loops on your finger.


Once all of the loops are on there, you go to the loops that started it all--that very first row that you did (Our first row was pink). This is the trickiest part in my humble opinion. You have to take those first 4 loops and thread them onto the extra, too. (So you've got the first and last loops on the extra one that you set aside in the beginning).

Sorry...that's probably not the best description...but hopefully all of my photos will help make things clearer...
Once you have those beginning and ending loops on the extra one, you tie a simple knot, trim, and flip it over. Voila! You're done! Super easy, super fun.


My kids (6, 5, and 2--yes, even the 2 year old) loved this. I just had them hand me whatever color they wanted next and did it that way (my 5 yo son's bracelet is the lovely green, yellow, and blue one above). The 10 loop bracelet (the one I explained above) will fit an adult just about right. For my kids I think I only used maybe 8?? Sorry I didn't keep track...BUT, the great thing about these nylon loops is that they stretch. When you take it off your fingers you might be concerned, just tie the knot and stretch it a little and you're good.

No comments:
Post a Comment