Thursday, July 14, 2011

super fast, super easy, super cute bracelets

First things first...I suck as a blogger...a child could blog better/more often than I do...my apologies...not that I think I have that many people checking this blog out...maybe down the road that'll change and I'll look back to this post and laugh? Yeah...I don't know about that either...

Remember these things?

Well, they're back. I remember making bracelets and hot pads and other odd things from them when I was a kid in the late 80s or early 90s. I saw the cutest idea and had to share. It's a great, fun little thing to whip out during the summer break when your kids come whining to you about how bored they are (that's why we've made about 10 so far today).

I got my bag at Hobby Lobby. I got an enormous 1 lb. bag for $5...there are hundreds of loops in there... I let my kids pick and this is what they chose, but I think I may go back for the neon colored loops...I think I'm attracted to the neons because of all of the neon colored clothing my parents made me wear as a kid. Okay...so...back to the project...

Pick out 3 colors that you like (you don't have to do a 3 color pattern, you could do whatever you want, this is just what we're doing because it's easier to explain), take 3 loops of 2 colors and 4 loops of the 3rd, but set that extra loop aside until the end. *Make sure you stretch the loops out a little bit before you get going.


Take the first color loop (ours was pink) and twist it around your fingers like so.


Then take the 2nd colored loop (green) and do the same thing.


Now, take the pink loops and pull them over your fingers so that you just have the green loops on your fingers. It's like using a loom--take the bottom row and loop it over the top, and only have ONE color of loops on your fingers at one time.

This is what it should look like palm side up


Palm side down


Now take the 3rd color and do the same thing: twist them onto your fingers and loop the previous color over. Continue those steps in order until you've used all but that last, extra loop. This is what it should look like front and back.


Now, you're gonna take all the loops off your fingers and put them onto your index finger--one-at-a-time from the bird finger to the pinkie. Like so.


Next you take that extra loop and slide it under/through all of the loops on your finger.


Once all of the loops are on there, you go to the loops that started it all--that very first row that you did (Our first row was pink). This is the trickiest part in my humble opinion. You have to take those first 4 loops and thread them onto the extra, too. (So you've got the first and last loops on the extra one that you set aside in the beginning).
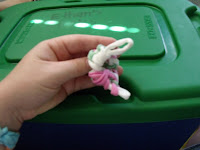


Sorry...that's probably not the best description...but hopefully all of my photos will help make things clearer...

Once you have those beginning and ending loops on the extra one, you tie a simple knot, trim, and flip it over. Voila! You're done! Super easy, super fun.


My kids (6, 5, and 2--yes, even the 2 year old) loved this. I just had them hand me whatever color they wanted next and did it that way (my 5 yo son's bracelet is the lovely green, yellow, and blue one above). The 10 loop bracelet (the one I explained above) will fit an adult just about right. For my kids I think I only used maybe 8?? Sorry I didn't keep track...BUT, the great thing about these nylon loops is that they stretch. When you take it off your fingers you might be concerned, just tie the knot and stretch it a little and you're good.

Monday, April 18, 2011

The Trashy/Scrappy Wall Hanging Post (Part 1)

I was perusing one of my favorite craft blogs Make It and Love It and I saw this post. I loved the idea that they used to make custom sized wall-hangings. I'm sure you've seen the tutorials where they do the same sort of thing except with canvases, right?

So, I don't know if I've mentioned it or not, but I'm a cheapskate...Yep...total tightwad... I was trying to figure out how to put this same idea together another way...except this time it wasn't because I was a tightwad over the expense of the building materials, it was because the battery pack to my drill/saw is dead and I need to buy a new one. I recently had 2 dental implants done--that process included braces...plus 3 kids...so yeah...I've got other things to pay for right now.

I digress...

Here are some of the things I used for this puppy:


So, I was trying to decide what size to do this thing. I had an old our Wii Fit Board box that I was going to get rid of and so that's what I used...a Wii Fit Board box. It was perfect, the size and the thickness of the sides (how far raised from the wall it'd be) were about right, I though. I almost used an old diaper box-- which totally would have worked. Originally I went and measured about 3 inches down (on the long side) and was going to cut around that (so it'd be about 3 inches off the wall).

Okay--so after I had my "frame" this is what I did.

I unfolded my fabric, which I think may have been folded as it was for at least a decade. Thank goodness for a spray bottle and steam, right? Thanks mom for cleaning out your stash.

I decided that I needed to have a layer between the fabric and the box--so that the Wii Fit people didn't show through.

Remember, a couple posts ago I mentioned that I love freezer paper stencils and my Silhouette machine? Yep...Mmmmhmmm (like they say in the alley on 'King of the Hill') that's what I used.

I heard this quotation by Thomas S. Monson, the president of the LDS church, and I loved it, so that's what I decided to put on my wall hanging. Originally I was going to do mine like the one on Make It and Love It, but...as crafty ideas floating around in my head...it changed.

I typed it up in Silhouette Studio and I apologize, I'm not sure what font I used. It was one of the basic ones that come with the software or Microsoft, then I cut it out. Yes, I used my Silhouette machine to cut out a stencil. It's pretty easy actually.

I'm sure there are better ways to do it, but this is how I do it. I cut off a piece of freezer paper and just lay it on top of the cutting mat not really worrying about how straight it is--as the freezer paper is always bigger than the mat. The biggest thing to try and do right there is try to get it on without any air bubbles. If you can get it on the first go it's even better. Then, I just trim the excess paper from around the mat and off it goes. **Oh and I usually send it through on patterned paper with the yellow tip cover thingy.

Before you take the paper off, check and make sure that it's fully cut. Once in a while it'll miss a little spot--not always, just sometimes. After that, you're golden, just remember to keep the middles of the letters--like the centers of the o's and so forth.

Once you've got your stencil, your set to iron it to your fabric and silk-screen it on. If you aren't familiar with freezer paper stenciling, head on over here real quick; it's where I learned.

Friday, April 15, 2011

The Procrastinating/Cake Stand Post

This is entitled the Procrastinating Post because well...I'm sure you can guess. My daughter's birthday is next week and her party is this week...on top of everything else. So the post that I promised I'd post last week has still not been posted--and that's why... It's not really because I've been so busy with the party, it's because I've been busy with normal stuff, a few quickie crafty things (I swear I will post those at some point), and procrastinating on the party as well.

Anyhoo, here's a super quick, super cheap cutesy craft. My daughter decided that she wanted a tea party birthday party, so I've been trying to think of fun little things to go along with that type of party. Said daughter takes dance lessons in town not super far from our house, but far enough that if we were to drop her off and come home we'd have 10 or 20 min. before we had to get in the car and go back to get her. Instead, I take my younger 2 kids to the Dollar Store to poke around for cheap craft ideas and, in the spring, we trek on over to the park, too.

So this week at dance I've had tea party on the brain and while we were there, I found the perfect things to make a cake stand. I'm sure this is no news flash--this is the kind of thing that's everywhere, but instead of being a complete lame duck, I'll post it and try to be a step up from lame duck.

So first, you go to your local Dollar Tree and you get this (a cute plate)


and this (a glass taper candle holder)


Then you spray paint it to look like this....or whatever color you want it to be.


I didn't know if the spray paint would work, but it totally did! After that it's super easy peasy. I wasn't going for quickness not long lasting hold. You could use epoxy or something to glue the 2 pieces together, but I went with hot glue. The next thing you do is find the center of the plate. For me it was easy to know where to glue the candle stick to the plate because there was a big stamp on it right in the middle--about the same size as the candle holder. I just put glue around the top of the candle holder and stuck it right on.


Voila!

I spent a gra
nd total of $2 on this beauty! Ca-ching!!!

Friday, April 8, 2011

The Double Lie Post

I told you yesterday I wouldn't be here to post today because of the wedding we went to today, but I lied....doubly now... I said that I probably wouldn't post until Monday--and it'd be of a project... How's a picture instead? I thought it was pretty cool.

For such crappy spring weather, it sure did look nice, but who doesn't love a good sunset shot? As far as the weather goes: Thanks for nothing Mother Nature and Utah! As far as the picture goes: sorry about the quality, it was an iPod shot after a trip to the store.

Thursday, April 7, 2011

Some of my Projects

I was going to do a post on one project in specific, but I'm going to be at a wedding tomorrow and the weekend in combination...the chances of that happening sooner rather than later are slim. Here's a slideshow of a few things I've done to fill up this big white space. As you'll see, I don't stick with any one type of crafty thing--I go in spurts, bet bored of whatever I'm doing, and move on to the next medium. I've been working on a super cheap, cute wall hanging, so I'll probably post a tutorial on that next week. Oh right, the slideshow...

A few of my favorite things

Here are some things that I'll be referencing or photographing on this baby...

My iPod

No matter what I'm doing, I love me some tunes and having an on-the go camera. I am one of the few in the stone age without a cell phone (heck, I'm a stay-at-home mom and I don't want one more bill).

My camera
Nothing fancy--Fujifilm FinePix s1500

Sillhouette Cutter


Sewing Machine & Serger (sorry, I don't have pictures) they're a White and a Singer--neither overly fancy.

~Random things like freezer paper, glue guns, scrapbooking stuff...and I guess if there's anything I left out, you'll be seeing it. ;)

Starting off...

Welcome to my blog! This is me...

I'm Ashley...Ash...or SmAsh and SmAshy to some...it's a long story, but I got it playing sports in about this period of my life-->

This is my sponsor:
His name is Trent. We got married at the dawn of the digital age, almost 9 years ago.

These are my peeps:
Yep 3 of 'em. Sometimes I can get them all to look at the camera at the same time. They're pretty cute...except when they destroy my stuff. It's part of why we don't own nice things--or, more accurately, why I'm too cheap to spend too much money on some of the stuff in our house. As much as I love the three of them, they are part of the reason that I started this blog and have stuff to post: I craft for my sanity. To give me something to think about besides mom stuff.

I don't know if anyone cares about this part, if you do then tough luck for you I guess (did I mention that I have a tongue-in-cheek, sarcastic sense of humor? Well, I do). I'm an Idahoan by birth (you know that place that 'Napoleon Dynamite' was filmed in--yeah, that's my hometown), a Utahan by force. I'm a stay-at-home baby mama to the peeps pictured above--'Jeanie-Beanie'--my almost 6 year old, Rayman-almost 5 (yep, Irish twins--1 year and 16 days apart), and 'The Favorite' my 2 year old "baby" referred to as the favorite because she knows how to play up her strengths, win friends, and influence people...she's a a funny little girl with her father wrapped around her tiny little toddler sized finger.

Right now, I basically plan on posting pictures of stuff I've done maybe tutorial style (if anyone out there in the interwebs cares), but at least as a compilation of what's been going down in the hizzouse.